
The iPhone has so many clever and fun little features that it's easy to miss some of them. One of the most whimsical features to come along in recent years is the ability to lift the subject of a photo away from the background so you can use it elsewhere — whether that's sharing it in an email, pasting it into a photo editing app, or even turning it into an iMessage sticker in iOS 17.
What's especially fascinating about this is that it seems like such a simple thing to do — and Apple does make it really easy — but there's a ton of number crunching going on under the hood to make it happen. This means you'll need an iPhone with a reasonably modern processor, but the good news is that it doesn't have to be the latest and greatest iPhone 15 Pro. While the insanely powerful A17 Pro chip in Apple's flagship smartphone surely helps things along, this feature can be used on any iPhone with an A12 Bionic chip or later, which goes back to the 2018 iPhone XS and iPhone XR.
You'll need at least iOS 16 on your iPhone to pull this off, or iOS 17 if you want to turn a subject into a sticker. However, what's great is that even though it's an expansion of Apple's Visual Look Up feature that lets you get more information about things like pets and flowers (and now even food and laundry labels in

How to create and copy a photo cutout
The most straightforward way to use this feature is to copy the subject of a photo onto your system clipboard. You can paste that into any other app that supports images, such as Messages, Mail, Notes, or your favorite photo editor.
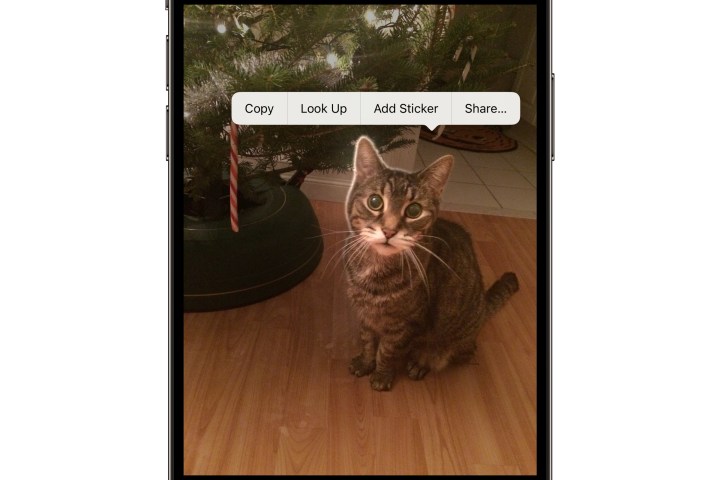
Step 1: Open a suitable image in the Photos app on your iPhone.
Step 2: Touch and briefly hold the subject of the photo until a glowing outline appears around it.
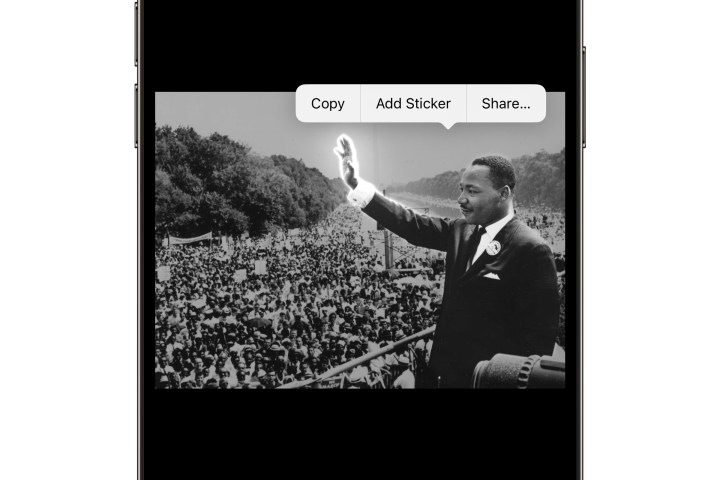
Step 3: Release your finger. A context menu should appear.
Step 4: Select Copy. The outlined subject is copied to your clipboard.
Step 5: Open another app and paste your clipboard content as you would for any other image. Only the subject of the photo will be pasted.

How to share a photo cutout in another app
If you merely want to share the subject of a photo via a messaging or social media app, you can skip the clipboard and do this directly via the iOS 17 share sheet.
Step 1: Open a suitable image in the Photos app on your iPhone.
Step 2: Touch and briefly hold the subject of the photo until a glowing outline appears around it.
Step 3: Release your finger. A context menu should appear.

Step 4: Select Share. The iOS sharing dialog appears.
Step 5: Select where you want to share the selected subject. The selected app opens as it would for sharing any other photo, but only the subject of the image appears.
How to copy a photo cutout using drag and drop
It's also possible to copy the subject of an image by dragging it from the Photos app into a third-party app that supports drag-and-drop. This works with most built-in apps like Mail, Messages, Notes, and Reminders. It's also convenient when working with third-party photo editors.
Step 1: Open a suitable image in the Photos app on your iPhone.
Step 2: Touch and briefly hold the subject of the photo until a glowing outline appears.
Step 3: Begin moving your finger without lifting it. You should see a copy of the subject being dragged out of the photo with your finger.
Step 4: Continue holding your finger on the image while using another finger to swipe up from the bottom of the iPhone screen to return to the home screen.
Step 5: Continue to hold your finger on the image, and use another finger to open the app you would like to drop the image into.
Step 6: In the target app, drag the image to where you would like to paste it and remove your finger to drop it in place.
What happens next will depend on the app. Photo editors will usually add the subject image as a new layer that you can move, resize, and edit in the same manner as any other image. Dropping the image into a messaging or social media app will paste it into a new post. If the target app doesn't support pasting images, nothing will happen, and the subject will be discarded.
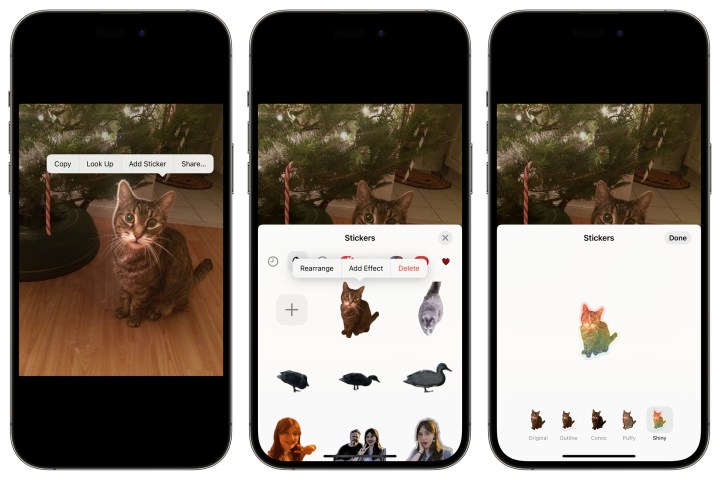
How to create an iMessage sticker from a photo cutout
A fun new feature in iOS 17 lets you create your own iMessage stickers from your photos. The same method for copying and sharing a subject can now be used to turn it into a sticker directly from your Photos app. Here's how.
Step 1: In the Photos app on your iPhone, open an image that you'd like to turn into a sticker.
Step 2: Touch and briefly hold the subject of the photo until a glowing outline appears.
Step 3: Release your finger and a context menu should appear.
Step 4: Select Add Sticker. The Stickers dialog will appear and your subject will be dropped into the top slot. Depending on your iPhone model, this may take a second to happen. A context menu will appear above the new sticker once it appears
Step 5: To move the sticker to a different spot in your collection, select Rearrange, touch and hold on the sticker, and drag it to its new position. When done, touch briefly anywhere in the Stickers window to exit rearrange mode.
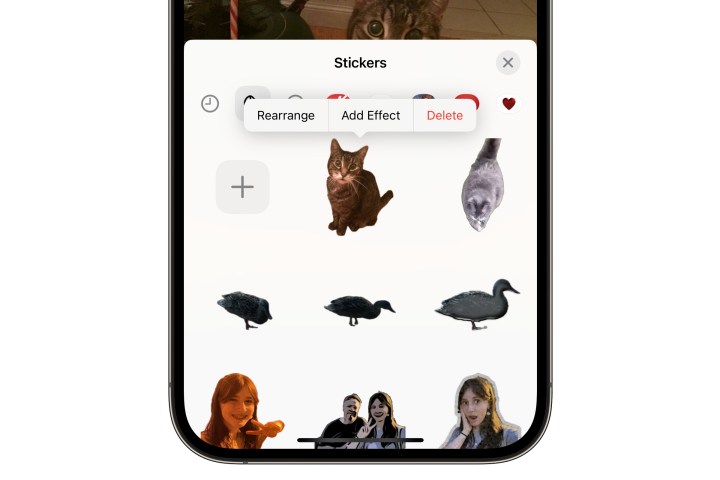
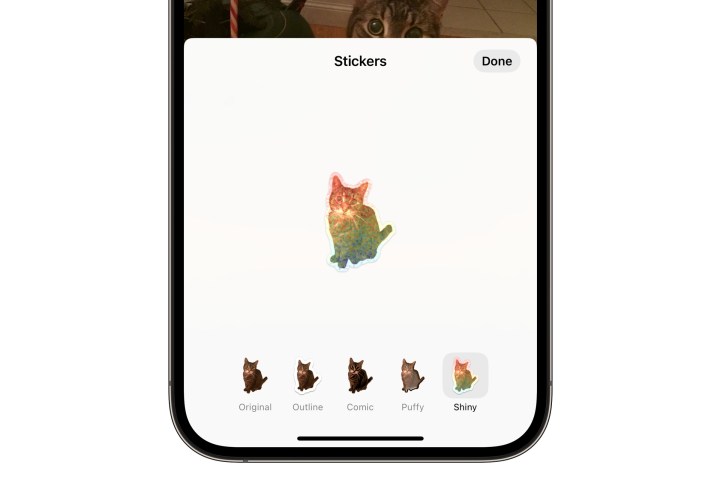
Step 6: You can also add an effect to your new sticker right away by selecting Add Effect from the context menu. Your sicker will appear with the five available effect options — Original (no effect), Outline, Comic, Puffy, and Shiny. Choose the one you'd like to see a preview of it, and select Done when you're satisfied.
Step 7: When you're finished customizing your new sticker, select the X in the top-right corner of the Stickers dialog to close it. You'll find your new sticker waiting for you in the Messages app whenever you want to use it.
Editors' Recommendations
- iOS 17: How to share contacts using Apple’s amazing NameDrop feature
- I tried the iPhone’s new Journal app. Here’s what’s good (and bad)
- iOS 17: How to delete a wallpaper on your iPhone
- iOS 17: How to move notifications to the top of your lock screen
- iOS 17: How to change the clock font on your iPhone


